Well what better way to celebrate Christmas than with lots of cool out of focus photographs? These aren’t any normal out of focus photos, these are Christmas themed out of focus photos.
First to Wikipedia for the science:
“Bokeh has been defined as “the way the lens renders out-of-focus points of light”. However, differences in lens aberrations and aperture shape cause some lens designs to blur the image in a way that is pleasing to the eye, while others produce blurring that is unpleasant or distracting—”good” and “bad” bokeh, respectively”
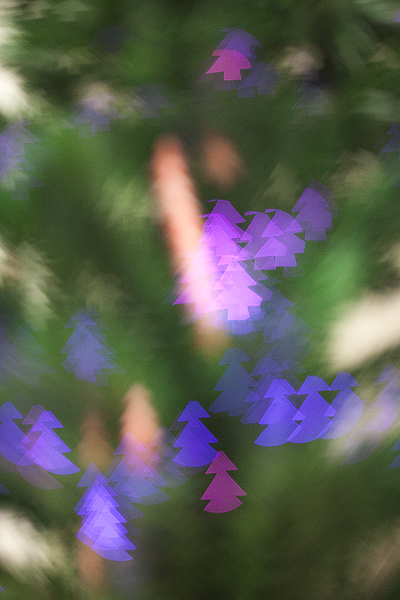
In other words, bokeh is that nice fuzzy background we get when taking portrait shots at a high aperture (F1.8 or there abouts). So what makes the dots round? Well they are round because of the shape of the aperture within the lens. But what if we had a Christmas tree shaped aperture, would the fuzzy background have Christmas trees in it? YES, and good times will ensue.

I want that noooow….ok ok, well there are a number of ways to go about it. ‘Method Nifty fifty’ is without a filter holder (lots of electricians tape and cardboard) and ‘Method Filter Holder’ is with a filter holder (clue in the name), this proves to be much easier and effective. Both methods require a fast lens, so one that has a large aperture such as F1.8-F2.8 (look at the end of the lens for the number) which will yield the best bokeh. The nifty fifty (50mm F1.8) is ideal for this.

Supplies:
– Black card: ‘Method Nifty fifty’ requires about 200gsm card, ‘Method Filter Holder’ requires something about the same thickness as filter so it can slot in the filter holder.
– Cutting board (or similar) and a scalpel (careful children, might want to let someone else chop their fingers off)
– Metal ruler, great for cutting straight lines with a scalpel and measuring stuff.
– Pen
– Camera and fast lens (F1.8), of course
Method Nifty fifty (no filter holder)
Additional Supplies specific to ‘Method Nifty fifty’:
– Tape, I like electrical tape as I can rip it off, it’s black (my favourite non colour), and it sticks to things.
– CD, a pair of compasses or something round (see step 3)
Step 1 – trace around the front of your lens keeping the pen vertical (not angled)

Step 2 – mark the center of the lens by measuring with your ruler

Step 3 – Draw a bigger circle around the one you have just drawn. In the case of a 50mm F1.8 lens a CD works perfectly for this


Step 4 – Cut the larger circle out

Step 5 – If you are using thick card as I am, you may want to gently score the smaller inner circle so that it folds back easily

Step 6 – Cut several wedges from the inner circle outwards (so narrower in the middle, wider at the edge)

Step 7 – Measure the diameter of the widest aperture the lens can handle, in this case at F1.8 the diameter is about 30mm. On my 70-200mm F2.8 this is much bigger.

Step 8 – Draw whatever shape you want, I find Christmas tree’s work well…or a Batman symbol.
Important – The cutout can not be any bigger than the diameter we measured in step 7. In this case the tree is slightly smaller than 30mm.

Step 9 – Cut it out, this is where the ruler comes in handy (or not as shown below)

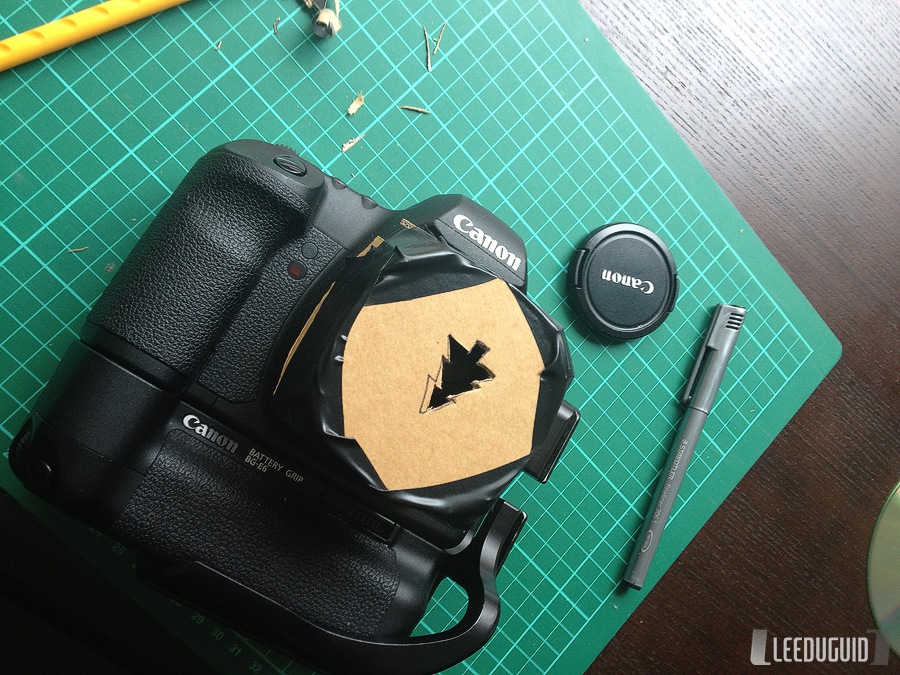
Step 10 – Switch the focus to manual (side of lens) and turn the focus until the subject is completely out of focus. Tape the cardboard contraption upside down to the front of the lens, add a couple more bits to hold it in place. You are now ready to take awesome photos!

Method Filter Holder
Additional Supplies specific to ‘Method Filter Holder’:
– Filter holder and filter adapter ring

Step 1 – Draw around your filter, in this case I used a solid ND filter as a template but any filter will do as long as it fits into the holder

Step 2. Cut the cardboard making sure you cut on the insides of the marker lines. This will ensure the resulting shape is the same size

Step 3. Use your lens as a template placing it in the middle of the cardboard draw around it

Step 4. Mark the center of the circle using the metal rule measuring in from the sides

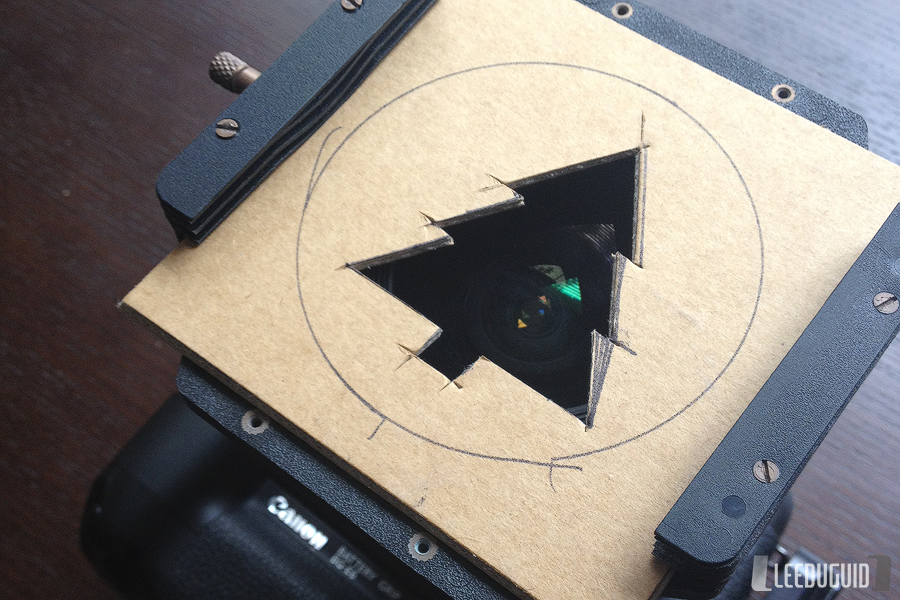
Step 5. Draw a shape that fit inside the dimensions of the lenses widest aperture (see step 7 of previous method) then cut out.

Step 6. Slide it in an off you go….happy days 🙂

Some more examples of the fun photos you can make.


Thanks for reading my post, Merry Christmas to you all from Lee Duguid Photography. If you liked this post please spread the Christmas cheer by sharing it with your friends.


